

December 25, 2011
December 23, 2011
Day two of travel back East
Wake up time: 5:30am. Something was wrong with the thermostat, it feels like we slept in a sauna. I'm super thirsty And have a huge headache. I must be dehydrated. We're hoping to be on the road by 6:00.
8:47am welcome to Pennsylvania!


6:15 were on the road! Time for breakfast. We looked for a Dunkin donuts but there were none on our route, looks like McDonalds again. This time we choose a little more healthier. I got the maple and fruit oatmeal which I may add its quite yummy! George choose the parfait which he has never had and loved it. Coffee is also on the menu to start our day.
We are just 30 minutes out of Columbus and the landscape has hanged drastically. We're in mountain country now. I miss the hills and the trees. This part of Ohio is lovely, I don't mind it much.
12:00 ish: Lunch! We stopped at Sheetz. For those that don't know what Sheetz is; It is a gas/quick stop chain very much like WaWa. You can go in type in your order and have freshly made food within 5 minutes. I love these chains and wish we had them in the midwest. It makes you feel better ordering a wrap rather then a burger and mcnuggets all the time. Lets step it up South Dakota!

Ordering food
My freshly made chicken caesar wrap. It was Amazing!
1:30ish- We hit Baltimore. Neat thing is that there is the tunnel system for the boat to come into the harbor so you actually go under water!

Entering the Tunnel

In the Tunnel

-35 feet below sea level
Blue Crabs! How I have missed you!

Factory
George's favorite thing to point out was RAY-RAY on the Under Armour Billboard
{ since I was blogging from my phone some how the rest of my post got lost so I had to add on. This is why the times have "ish" on them. We arrived in Maryland around 2:10. Not a bad ride at all on day two }

Winston was happy to run around the farm when we got back...
23 hours complete!
December 22, 2011
Travel to east coast
Okay people its 1:33am and my first thought is while im standing here in my bathroom....why the hell is my husband singing 'I'm so excited, and I just can't hide it'"? Seriously I'm excited but did I mention it's 1:34am now.... This is going to be a long trip.

It's now 3:52am I'm still awake and have learned of all the sicko satellite radio stations on at this time. Completely gross. We are about a 100 miles from Albert lee, MN. And have gone through 2 mini waters, trail mix, a piece of gum each, and now a diet mountain dew... I think it's more to keep our minds busy. I'm starting to get blurry eyed but I promised I'd stay awake until sunrise. What time does the sun come up anyway? 7:00? Ugh this may be rough.
Passed out at 4:15am woke up at 5:15am. Sorry sweetie but it was better then I did last year!
Mason city, is Micky D's for a quick pick up 6:04
6:23 roads are awful! A quarter inch of snow must have fallen last night and no plows. 23 degrees = ice for the net 30 mins. My body always tenses cause George cuts off the radio to concentrate but still proceeds to haul ass on the road.
7:18 roads clear! Back up to 70 mph!
8:19 cedar rapid Iowa. Home of Quaker oats. I love going past this city, it smells of warm oatmeal! George and I always laugh at the slavak museum sign since one of Winston's nicknames is slava.

 9am rest stop at last area in Iowa. After we pulled out of our stop we passed Iowa's I80 largest rest stop.

3:16pm we are at a gas station right on the outer loop of Indy filling up when we hear a guy yell to another "yea I been to jail before!" George says to me "I'm getting the hell out of here" we miss Mitchell already.

5:04 Ugh. Ohio I hate you. Every time we get to this area we lose time. Should've been in the hotel already and instead were in bumper to bumper traffic due to an accident.
Sweet only lost 20 minutes!
Ugh... Spoke to soon. We sat in traffic for one hour! Not even sure why, it's pouring ran, a truck cut us off and George has to slam on the breaks... That guy picked the wrong truck to cut off and George is making sure he knows that by laying on the horn for 30 seconds straight. I hate times like this.
7:24 finally in the hotel just east of Columbus. Subway for dinner, a nice shower and bed early. I feel yucky and fell light headed from all the motion of driving 16.5 hours!
Good Night!
Also, I'm blogging from my phone so I'll probably go back and fix the format once I get on my computer. I'm not sure how the pictures will turn out.


It's now 3:52am I'm still awake and have learned of all the sicko satellite radio stations on at this time. Completely gross. We are about a 100 miles from Albert lee, MN. And have gone through 2 mini waters, trail mix, a piece of gum each, and now a diet mountain dew... I think it's more to keep our minds busy. I'm starting to get blurry eyed but I promised I'd stay awake until sunrise. What time does the sun come up anyway? 7:00? Ugh this may be rough.
Passed out at 4:15am woke up at 5:15am. Sorry sweetie but it was better then I did last year!
Mason city, is Micky D's for a quick pick up 6:04
6:23 roads are awful! A quarter inch of snow must have fallen last night and no plows. 23 degrees = ice for the net 30 mins. My body always tenses cause George cuts off the radio to concentrate but still proceeds to haul ass on the road.
7:18 roads clear! Back up to 70 mph!
8:19 cedar rapid Iowa. Home of Quaker oats. I love going past this city, it smells of warm oatmeal! George and I always laugh at the slavak museum sign since one of Winston's nicknames is slava.

Quaker Oat Factory, Cedar Rapids IA

3:16pm we are at a gas station right on the outer loop of Indy filling up when we hear a guy yell to another "yea I been to jail before!" George says to me "I'm getting the hell out of here" we miss Mitchell already.
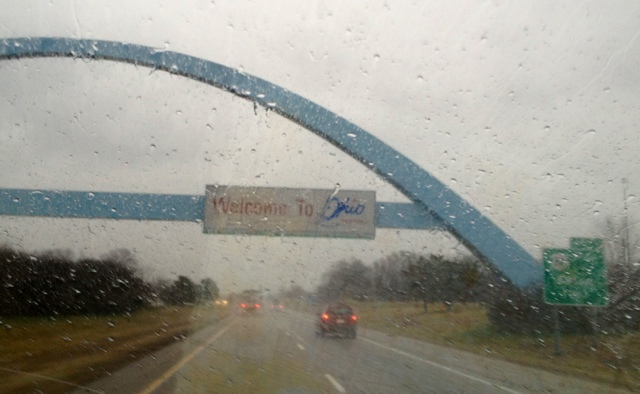
4:00 cross over into Ohio It's pouring rain.
5:04 Ugh. Ohio I hate you. Every time we get to this area we lose time. Should've been in the hotel already and instead were in bumper to bumper traffic due to an accident.
Sweet only lost 20 minutes!
Ugh... Spoke to soon. We sat in traffic for one hour! Not even sure why, it's pouring ran, a truck cut us off and George has to slam on the breaks... That guy picked the wrong truck to cut off and George is making sure he knows that by laying on the horn for 30 seconds straight. I hate times like this.
7:24 finally in the hotel just east of Columbus. Subway for dinner, a nice shower and bed early. I feel yucky and fell light headed from all the motion of driving 16.5 hours!
Good Night!
Also, I'm blogging from my phone so I'll probably go back and fix the format once I get on my computer. I'm not sure how the pictures will turn out.

Columbus, Ohio (Disliking you right now)
Safe travels!
December 21, 2011
{ On the Fifth Day of Cricut… }
One the Fifth Day of Cricut my Crafter made for me… Homemade Envelopes for all occasions!

I just found out that one of the cartridges I own for my Cricut machine has a button for creating envelopes! This is so exciting! I love sending mail to family and friends and never have any fun envelopes to use. They are always the generic white envelopes that everyone uses. Now I can even create the sizes I want them to be as well! Can’t wait to try them out!
Cricut envelopes are simple. Select the style envelope you would like. Set the size in Inches. Push Cut!
{ One }

{ Two }

{ Three }

Thanks for following my 5 Days of Cricut! I hope that you got some neat ideas from this blog. Please share if you also have some unique ideas as well!
Keep Following for the next few days…
They will be interesting to say the least!
Me + My Husband (George) + Winston
+ 1,400 miles in a truck Back East =
A very interesting Trip!

December 20, 2011
On the Forth Day of Cricut
On the Forth Day of Cricut my Crafter made for me; A display for Christmas cards!

I don’t know about you but my husband and I hate when our refrigerator gets cluttered with all sorts of junk; coupons, cards, important mail, pictures, magnets, etc. Here is one Simple way to display your Christmas Cards!
Items you’ll need:
- A String of yarn or Regular String (any color)
- Clothes pins
- 2 small command hooks
- Cut out Letters (mine made from my Cricut machine )
- Christmas Cards!
Follow along as I make my card line!
I have a space above my kitchen cabinets that I display my wine bottles. I wanted to decorate it with Christmas decor but never got around to it. It is looking really bare so I thought this would be the PERFECT place to display my cards. Now, many people are sending the photo cards so I can’t just place them up there, they wouldn’t stand on their own. So I am putting up a “Card Line” that I can clip my cards to. :)
First, apply your command strips to each wall at the same level. I choose about 5 inches up from my cabinets, that way the cards don’t droop over the tops of the cabinets and stay out of the way when I go to open the cabinet doors.

{ Picture } Step 1 & 2
I really like the command strips because they are small and clear so you really can’t see them on the wall. Let them set for at least 10 minutes if you apply them to wall paper. If you are applying them to a wall that has been painted, make sure to wipe the wall down in the spot you are placing the command strips, let dry then place them. They won’t hold tightly if there is dust or oil under the sticky surface.
Next, tie a knot at the end of your string and loop it over the hook of the Command hook. Pull the string across to the other hook, pull tightly and create another loop and place on the other command hook. NOTE: When you hang your cards the string is going to have to be pulled tighter and then re-looped onto the hook so the line does not sag. Wait until all of your cards are on the line so you know how much slack to tighten on the line.
After your line is up, take the letters you created and place them where ever you see fit. I printed the word ‘JOY’ out and put them in the center of my line. Use the Clothes pins to attach the rest of the cards and letters to your line. Once you have them staggered the way you like, go back to one end of the line and tighten the slack so that it isn’t drooping down.
And there you have it! A Simple way to display your cards!


Cost to me… $0.00! I had all of these items laying around the house and I’m sure you do as well! If you do have to buy the Command hooks they are less then $3.00 at Wal-Mart or Walgreens.
* Other places for this idea if you don’t have the space above your kitchen cabinets.
- Above a door frame
- Across your fireplace mantel
- String them Vertically and place to the right of an entrance way
- Find an empty wall and place shorter lines but hang more strings one above the other for neat wall art
Happy Holidays! 5 Days left until Christmas!

December 19, 2011
{ On the Third Day of Cricut... }
On the Third Day of Cricut my crafter gave to me: DIY Christmas Decor!
I have been working on my Christmas Decor and wanted to search for some great ideas for next year! Oh geez... Christmas isn't even here yet and already I am saying "next year"! I'm sure all of you ladies feel the same way. Here are some of the ideas that I came across.


I have been working on my Christmas Decor and wanted to search for some great ideas for next year! Oh geez... Christmas isn't even here yet and already I am saying "next year"! I'm sure all of you ladies feel the same way. Here are some of the ideas that I came across.
I love the idea of this frame art. I definitely wouldn't mind taking down some of the "farm" frames we have up in the house and putting something like this up for the season just to switch things up a bit.
I have yet to use my cricut to make Vinyl lettering. It's def. on my 2012 list! I've seen a lot of ornament detailing while browsing. Such an easy way to dazzle up a plain ornament! You can also use the vinyl lettering for Wall Scripture, photo frames, Pillows... ETC!
I love the twist on this frame!
Another easy project! Would look really cute across the top of my kitchen cabinets!
And the finale'!
We'll see about these... more of a time commitment but I love the idea!
Happy Cri-cutting!
Also, I wanted to give credit to the crafters who made these items so if their tag isn't on the picture, then I linked the photo I used. There are some great Cricut Blogs out there!
December 16, 2011
{ Second Day of Cricut }
On the second day of Cricut my crafter made for me:

A Laundry Chalk Board!
My sister Katie gave me the idea when she was talking with me about her excitement of moving into an apartment with friends this Spring. She said she has gotten so accustomed to placing dishes in the dishwasher after using them and emptying it once it was clean that she would have to come up with something to keep all the room mates in check! My mom has a little sign that you just flip over that says "Clean" on one side and "dirty" or the other.
For my idea I kind of just set up the sign I made in the Laundry room and have the words "Stinky" and "Fresh" on it. The fun thing with chalk is you can change it to whatever you want!

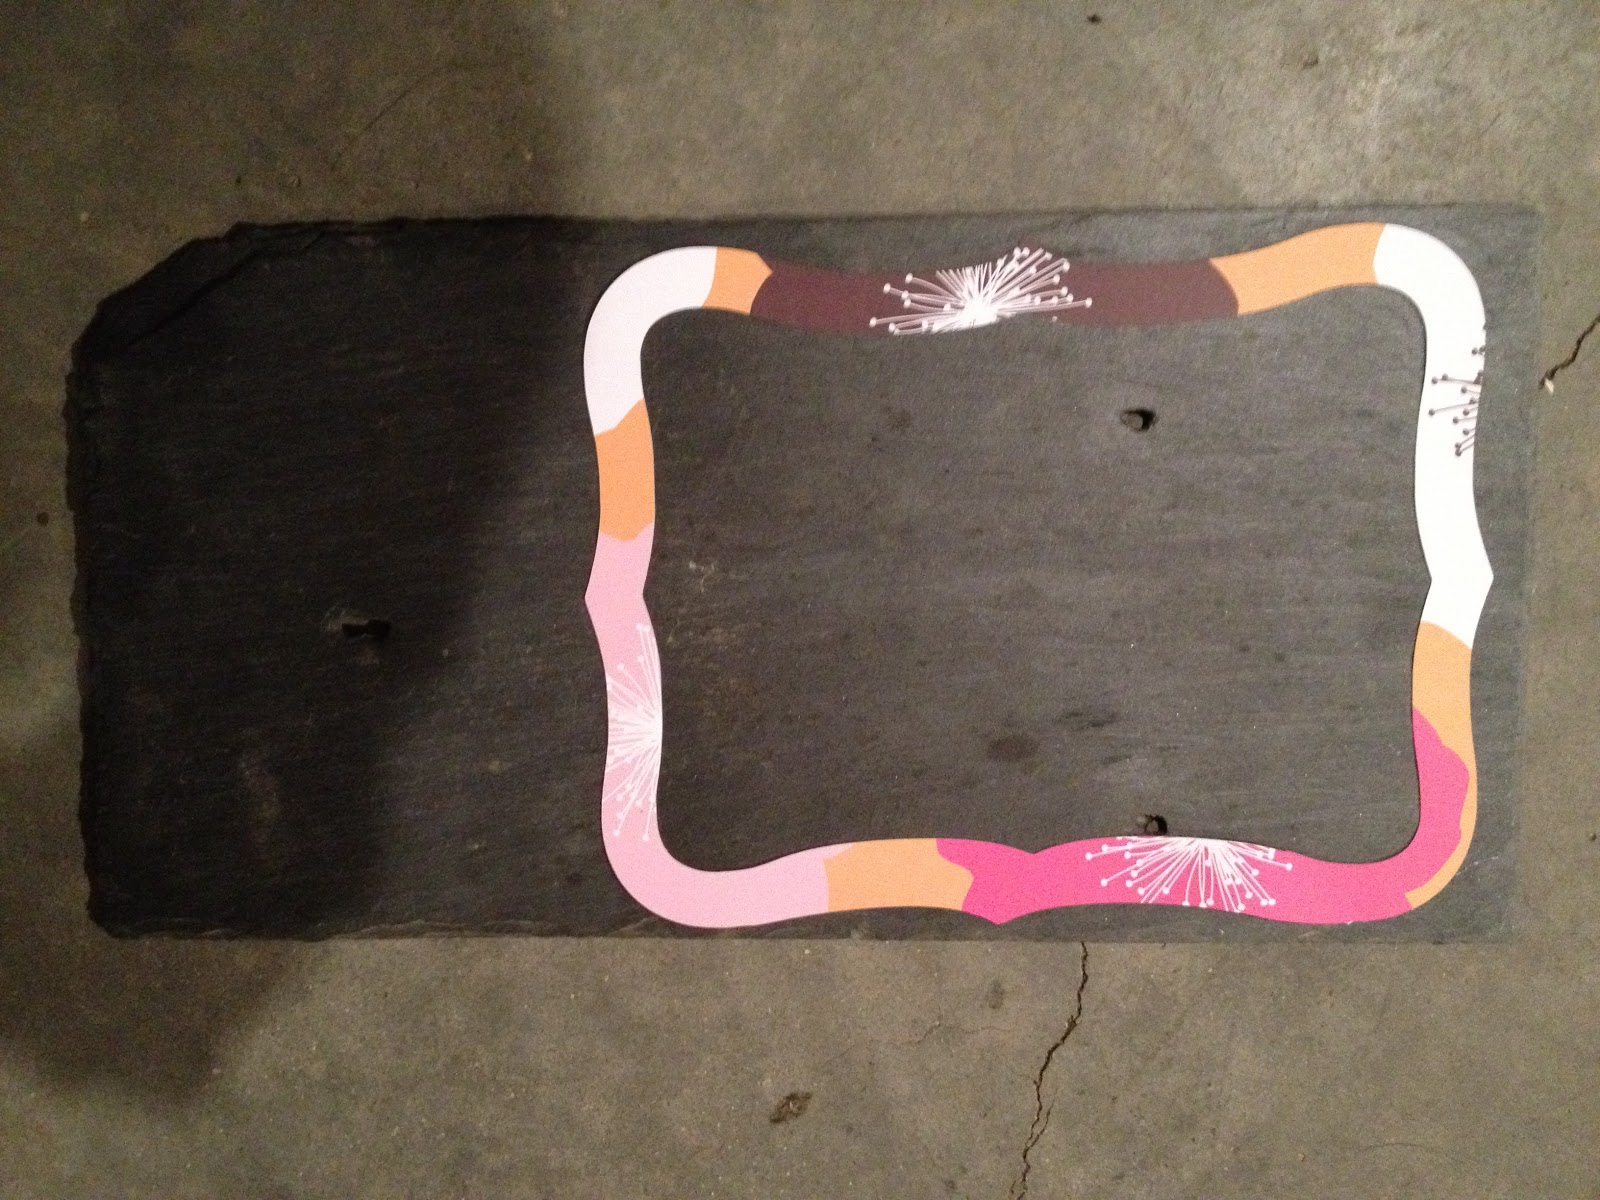
Old Stone Shingle from a Barn
While I worked at "Winterthur Garden Estates" I often took walks to ID plants and flowers. Along one of my walks I came across some old Shingles that had fallen from a barn on the property. Again, I love heritage and collecting things with a sense of some kind of neat story behind them so I found a shingle intact and took it to make into something - someday. Today is that day!

Next I picked the satin finished turquoise spray paint {bought at Menard's for $2.49} and spray the shingle with one layer. I wanted to still maintain the Stone color along the edges so I didn't coat them as much.

After I sprayed it I added my stencil that I made from my Cricut machine. Taped it down and painted inside the stencil with a "tinted chalk board paint". You can buy it at any home depo store for cheap and add up to 12 different colors! How fun!

I cut another smaller stencil and placed it vertical to have writing boards!
And WAAAH-LA!

For this example, I used Picasa to add on the letters to the picture. The paint for the board needed to dry another day before I could write on it, but I wanted to show options! Also, this is one of Katie's Christmas Presents! I wanted to see if she is actually following me on my blog... Sneaky sneaky... if you are reading this Katie, leave a comment. :) Like or Dis-Like?
Happy Crafting!
December 15, 2011
{ Life gets in the way }
Well, as you can see my 5 days of cricut is kind of on hiatus so I haven't posted. With Christmas coming right around the corner I have just been overwhelmed with wrapping, finishing knitting projects, cooking for pot lucks, etc. Plus the hubby has been away on business back East with our Internet hot spot which leaves me to only to be able to post while at work. It's been crazy there as well, so my apologies.
I will post my 2nd day of Cricut tomorrow! I promise!

I will post my 2nd day of Cricut tomorrow! I promise!
For now, Happy Wrapping!

December 9, 2011
Five Days of Cricut!
On the first day of Cricut my crafter made for me: A batch of tags for presents to be! {You know once you figured out the tune you tried to sing it}
For the next 5 post I am going to do some wonderful projects with my Cricut machine. If you have one please share your ideas! If you don't have one, this would be a great gift to ask for a Christmas. :) I got mine to Christmas 2 years ago from my mom. She knew how much I loved making my bulletins for my classroom really stand out for my students so she thought of it as an investment for me. They can be pricey but if you are crafty it is def. worth the investment!

What is Cricut?
My Answer: The all powerful paper cutting machine!

How it works! Place the Cartridge in the slot then load your cutting mat with the paper of your choice. Using the selection key pad choose what you would like to cut. Select the size you would like to cut the item at, then press cut!
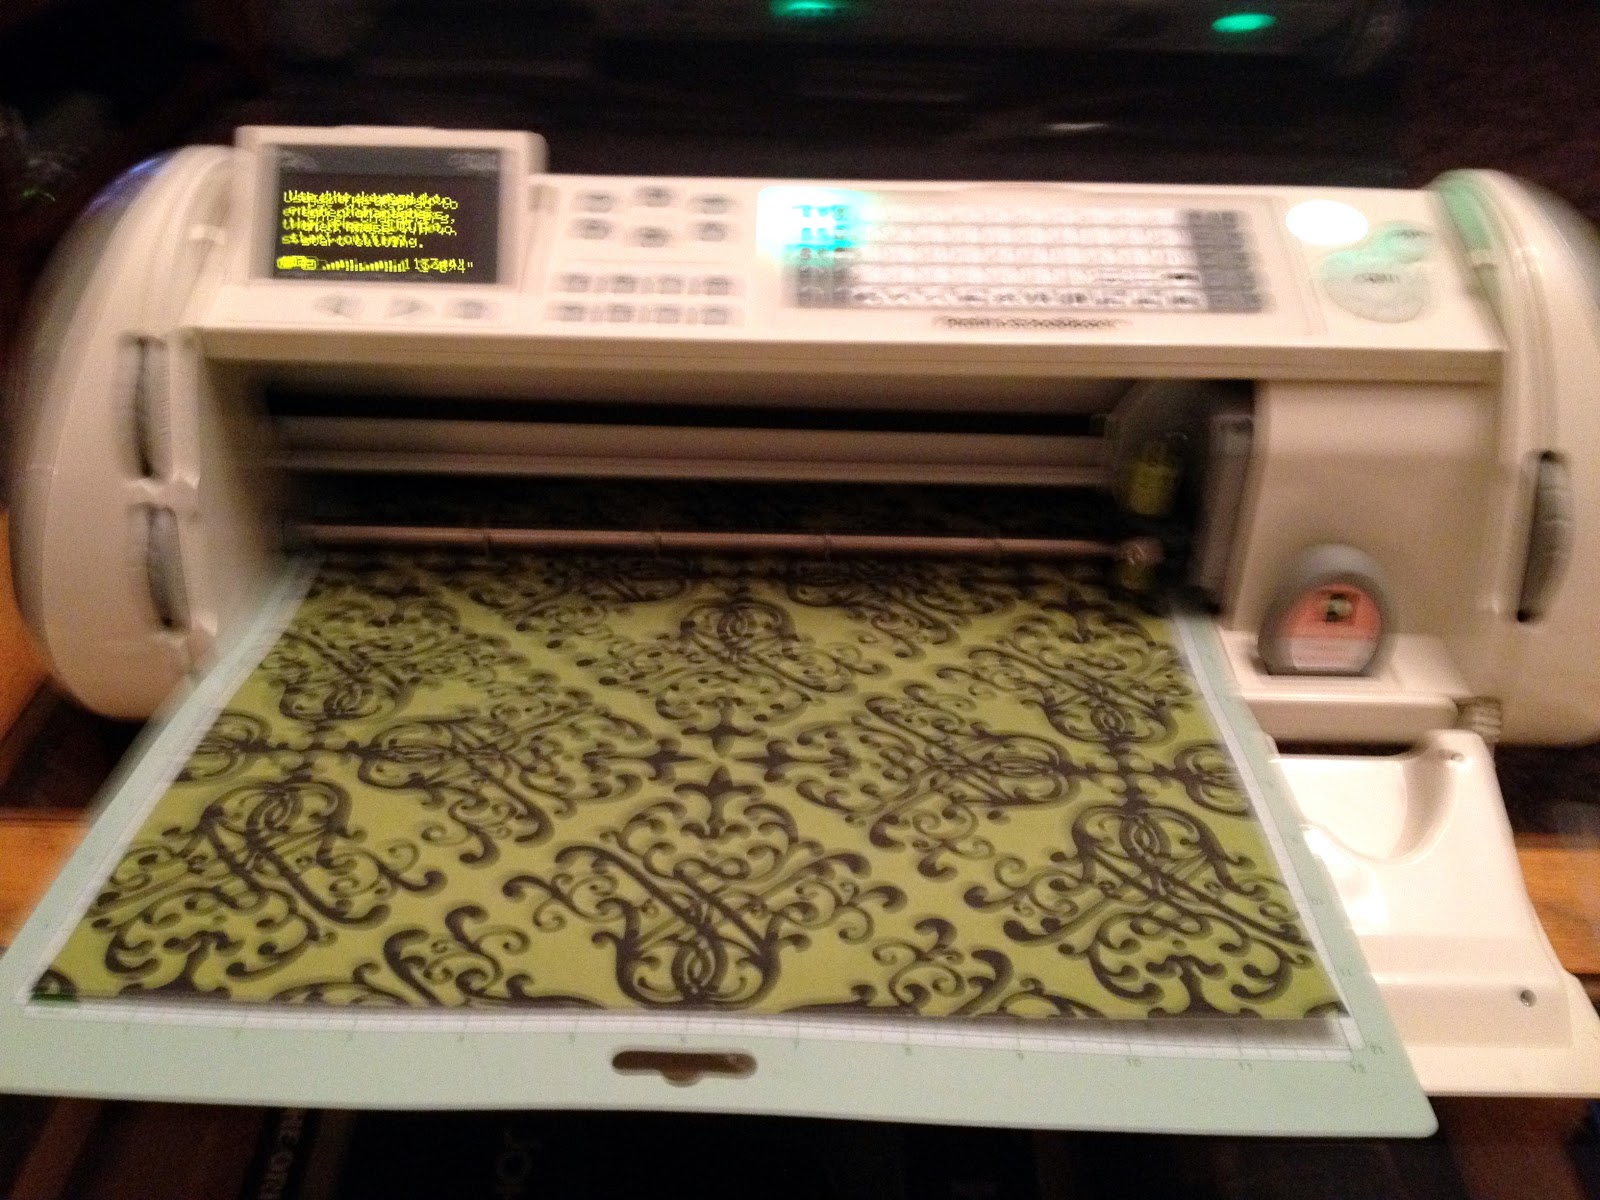
Sorry this came out a bit blurry. Here you can see my cutting mat is loaded. I decided I wanted to cut out letters to make a stencil that says "The Rigdons". The cartridge is the little gray and pink thing on the bottom right corner of the machine. I am using "Plantin School Book" for this project. It has the best letters for stencils.

Other projects I decided to go ahead and get started on are Christmas tags for presents. Instead of buying some of the unoriginal sticker tags I am making my own! How fun! Plus it won't cost me a thing since I already have my Cricut and tons of scrap paper! :) I Love saving money, what girl doesn't? That's money I can put towards a cute shirt or pair of shoes!


Christmas Tags! They even have the whole cut in the top already for the string you just can't see them because I didn't remove them from the cutting board yet.

Our Table Settings from our wedding. You can see the tags with the tractors.
Here is a glimpse of the Second day of Cricut project! Can't wait to share!
Happy Tagging!
December 8, 2011
Operation - De-Clutter!
Mission #1: De-clutter the Draws and Pantry in the kitchen!
George is pretty good about keeping me up to speed on having the house in pretty good looking shape. I say George because he is the neater out of the two of us. Honestly, I can deal with mail left on the dinning room table, and a few dishes in the sink, some laundry here and there... I sound like a slob. Really I'm just not AS on top of things as my husband. His motto is "Put it away to begin with and then you won't have to spend more time later cleaning it all up." So true! I catch myself saying this to myself now as I go up to bed and see shoes laying at the door... "Britttany" (the little voice in my head says) "Just go pick them up and place them on your shoe rack in your closet, you know you're not going to wear the name ones tomorrow". UGH! so I go pick them up and put them away.
Where we are really organized it what you see when you walk in a room. All blankets are folded, there are no papers sitting around, the coffee table is organized, the kitchen sink is empty, the bathroom doesn't have stuff all over the counter. Now certainly those things have to go somewhere! I've enlightened myself on the clutter-bugs that we are... we are "closet" clutter-ers. ha. No really we are. One of the blogs I've been following is "I heart Organizing" you can go to it by looking at my blog list on the left side bar. Looking at all this organization made me realize that we aren't as neat and organized as we could be.

Out kitchen nice and neat on the outside... a total unorganized mess on the inside
For my first task, I decided to tackle the kitchen draws. I have know for months that my drawers are a mess. I can't ever find the sandwich bags I want or I have to dig through the tons of cosies to get to some bake wear out.. How many Cosies do we seriously need? RIDICULOUS! For this task it only cost me $1! I bought a few "shoe containers" at Wally World for a buck. They are simple and just the right size. The other trays I already had. Here are my before and after pictures.


I should have taken a picture of my counter top while I was organizing! It was an absolute mess! It makes me feel better to know that these draws are organized, hopefully I can keep them that way!
Mission #2: The Laundry room Pantry...
About 2 months ago I went through and reorganized pots and pans. they were still in the same places my husband put them when he moved in. Basically, they were put in places that tall people can reach. I am a foot shorter then George so I was constantly reaching for bowls, pans, Tupperware. I'm the one that uses it all so I placed it where I could get to it. After re-evaluating the pantry it still was super cluttered with items. We store a lot of things from crock pots, dish towels, irons, hammers, extension chords, etc. So while we knew where it all was, it still looked like a hot mess! I did spend a little bit more on baskets that I got at Walmart and also bought a few more of the $1 shoe bins to store other items. Here is my before and after!


Much better! We still have a lot of things but we are people and we do live in this house! We have use for these every day items. I did manage to go through and put aside a box for Good Will and a box of duplicate items I am bringing home to my brother for his newly bought house!
What are some of the organization things you need to tackle?

Top Drawer - Utensils and napkins


Second Drawer - Misc


3rd Drawer - Cosie Land + who knows???


4th Drawer - Baking

Winston wanted to help...

I should have taken a picture of my counter top while I was organizing! It was an absolute mess! It makes me feel better to know that these draws are organized, hopefully I can keep them that way!
Mission #2: The Laundry room Pantry...
About 2 months ago I went through and reorganized pots and pans. they were still in the same places my husband put them when he moved in. Basically, they were put in places that tall people can reach. I am a foot shorter then George so I was constantly reaching for bowls, pans, Tupperware. I'm the one that uses it all so I placed it where I could get to it. After re-evaluating the pantry it still was super cluttered with items. We store a lot of things from crock pots, dish towels, irons, hammers, extension chords, etc. So while we knew where it all was, it still looked like a hot mess! I did spend a little bit more on baskets that I got at Walmart and also bought a few more of the $1 shoe bins to store other items. Here is my before and after!

Really not that bad... at least what I think anyway.

Much better! We still have a lot of things but we are people and we do live in this house! We have use for these every day items. I did manage to go through and put aside a box for Good Will and a box of duplicate items I am bringing home to my brother for his newly bought house!
What are some of the organization things you need to tackle?

Also, if your reading this PLEASE help! My next Operation De-Clutter is our
Hallway/Bathroom/Office Closet.
It is beyond a disaster!
Subscribe to:
Posts (Atom)